Proper Setup, Locking Tension Adjustment, and Safe Payload Mounting
The S-Port Quick Release (QR) system is designed for fast and secure payload installation while maintaining reliable electrical connection and stable operation. Proper installation and periodic maintenance are essential to ensure safety, performance, and long-term durability.
This guide summarizes the key points from our instructional video so users can easily understand the process and refer back whenever needed.
1. Warning & Prepare before installation
Correct installation ensures secure mounting and prevents damage to the payload or connector system.
Important Safety Notice
Ensure Correct Power Polarity
Always connect:
Positive (+) wire to positive terminal
Negative (-) wire to negative terminal
Incorrect wiring may cause permanent damage.

No Hot Swap
Do not connect or disconnect the payload while the system is powered on.
Always power off the system before mounting or removing the payload.
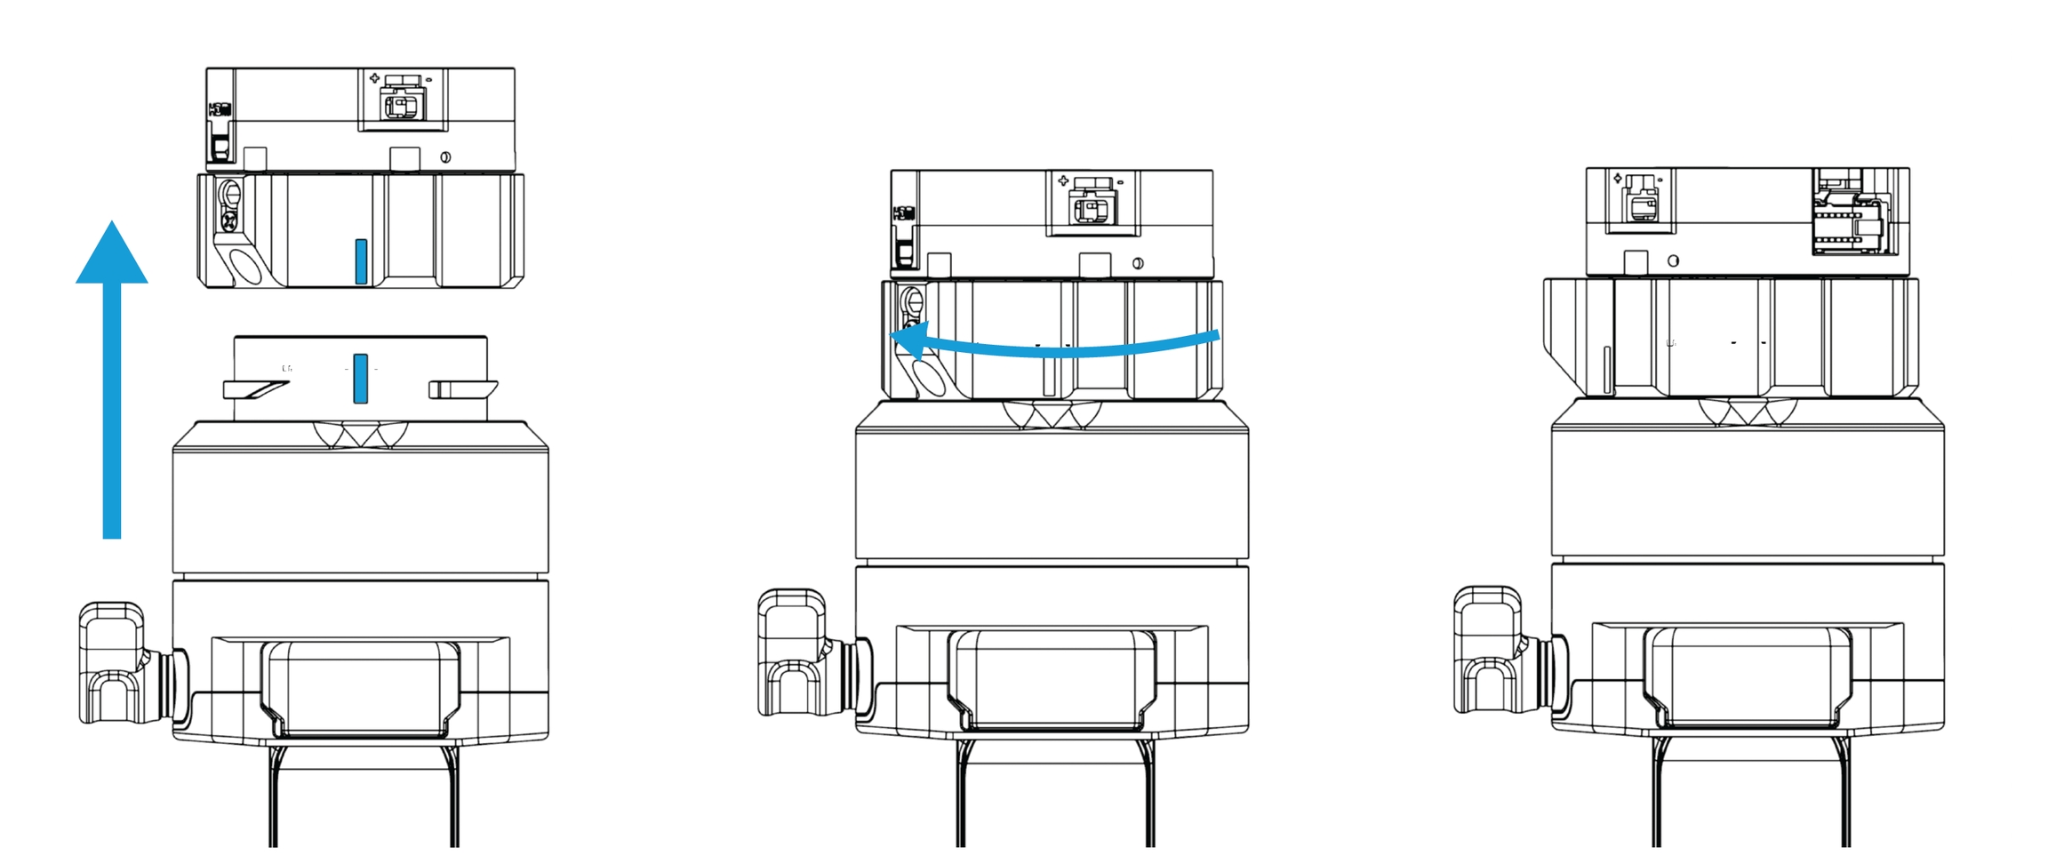
2. Installation Guide

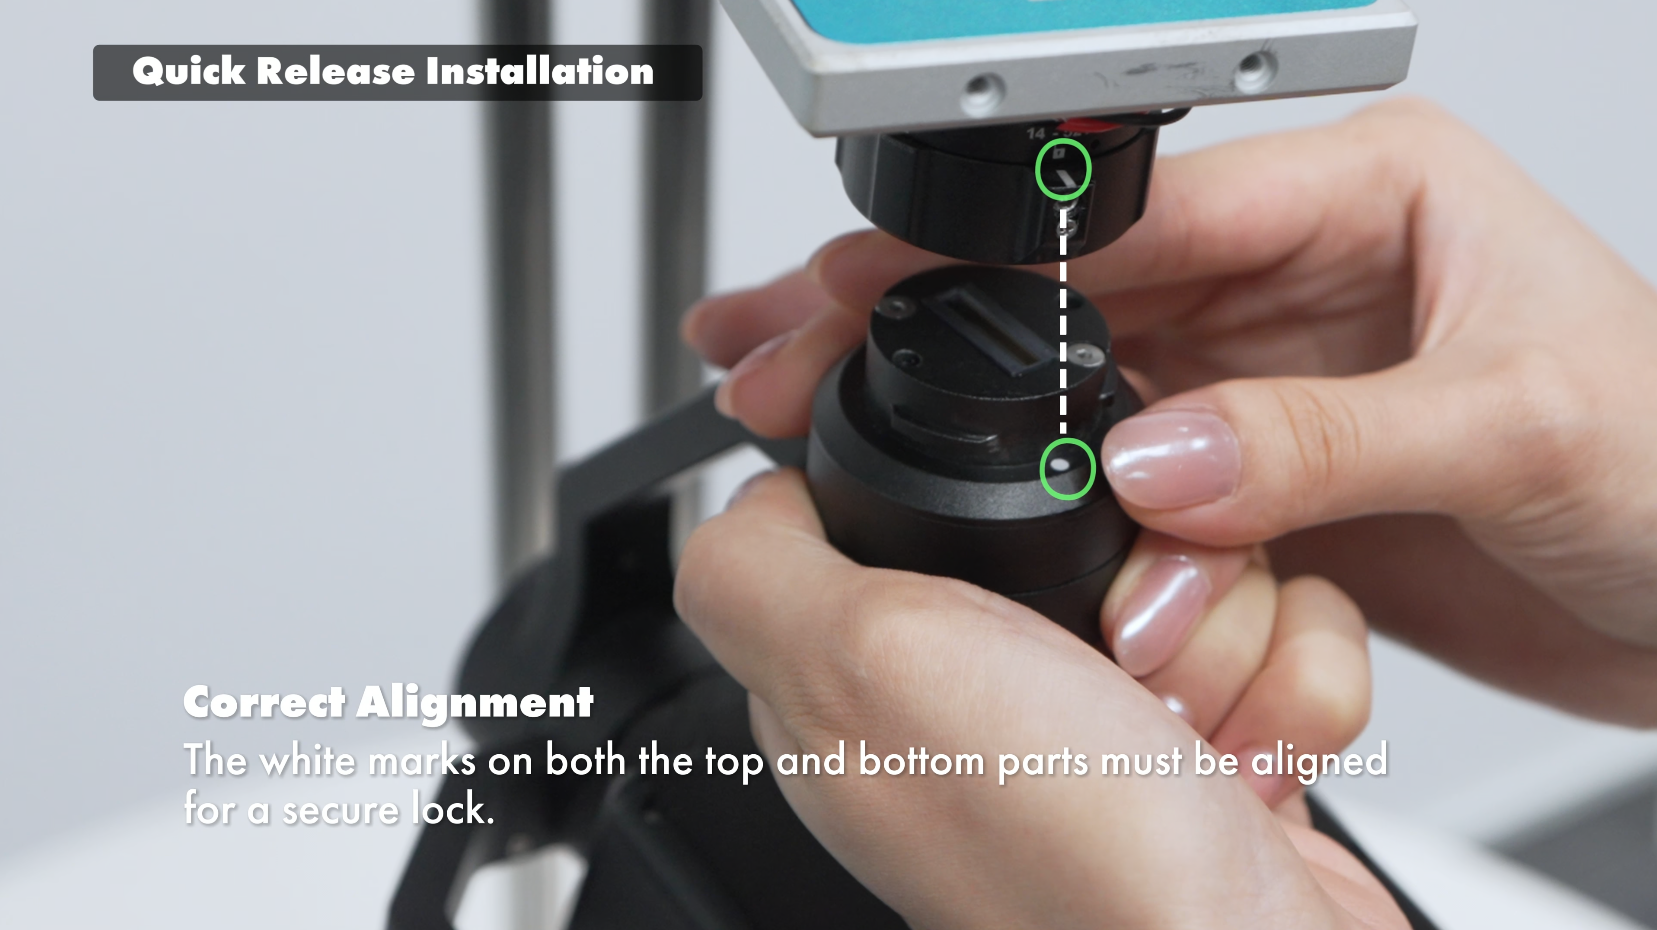
Proper Alignment During Installation
Correct Alignment
Rotate the mount until the white alignment mark is visible
Align the white marks on both top and bottom parts
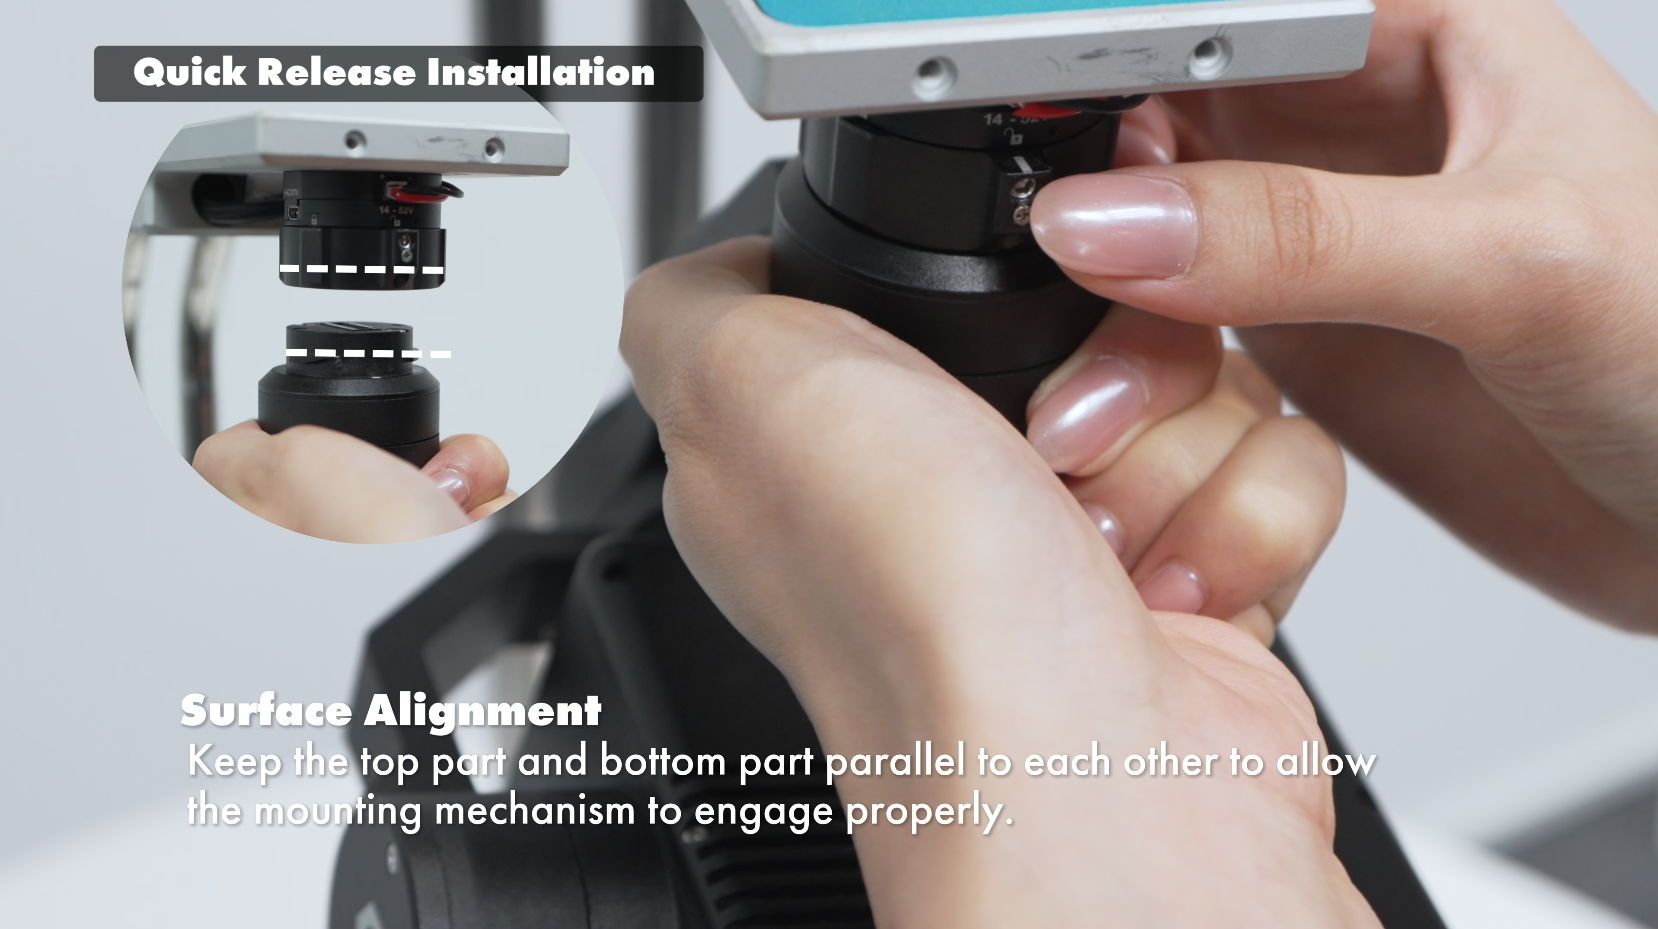
Surface Alignment
Ensure the top and bottom surfaces remain parallel during installation so the locking mechanism can engage smoothly.
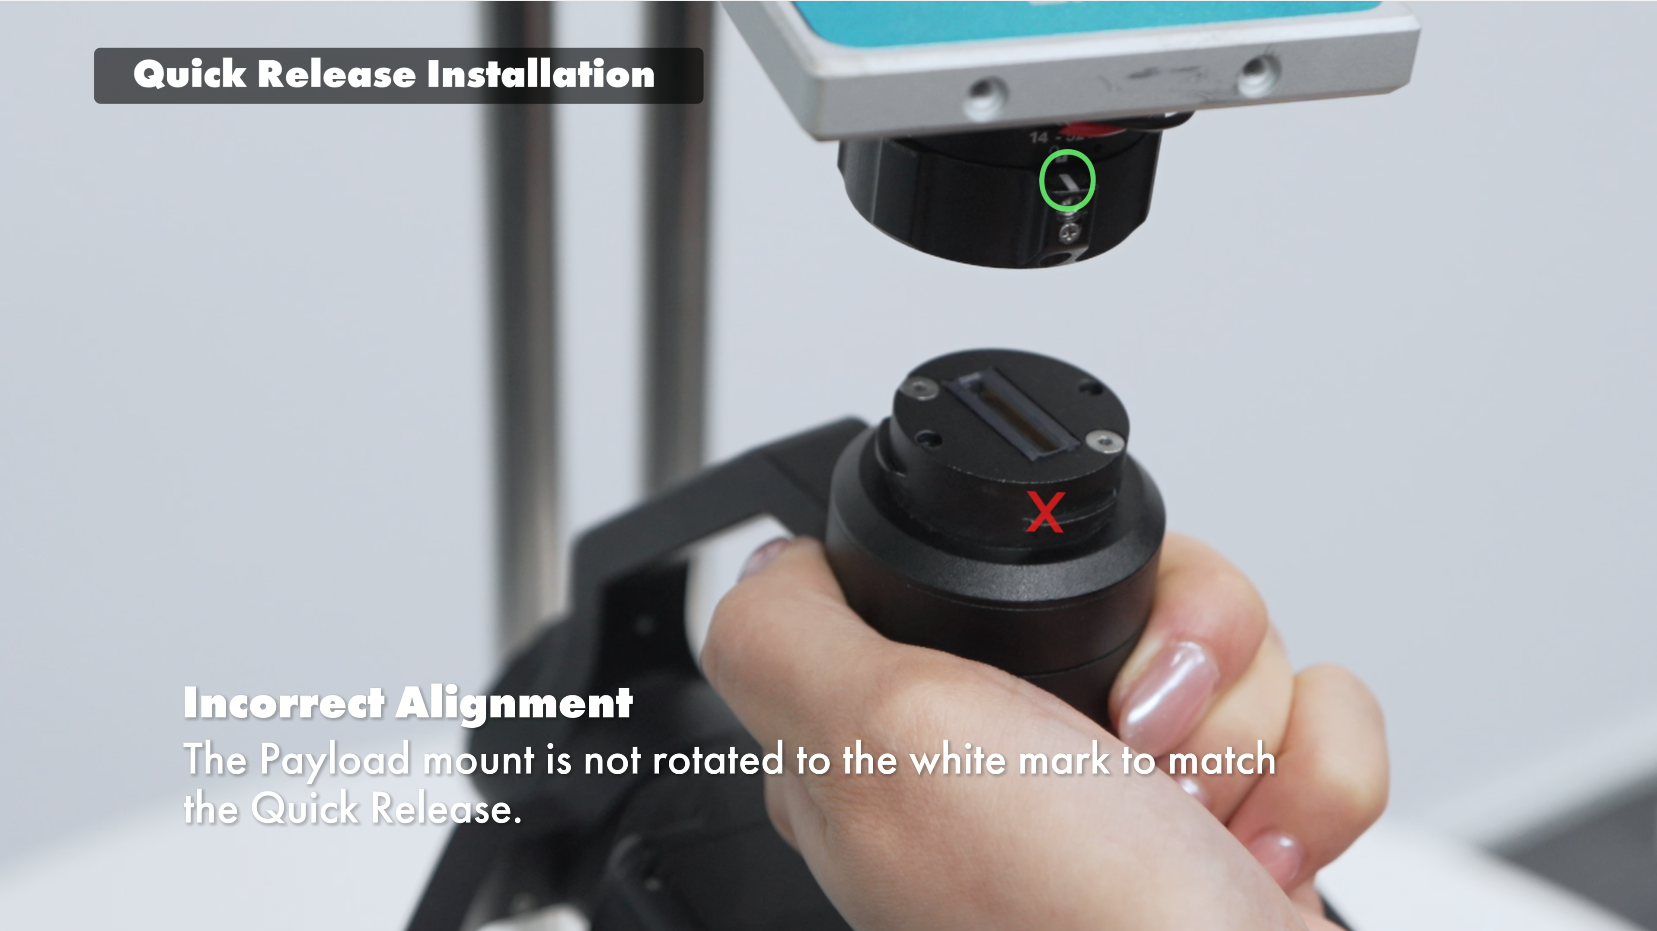
Incorrect Alignment
If the payload mount is not rotated to the white mark position, it will not properly engage with the QR system.
3. Maintenance : Quick Release Locking Tension Check and Adjustment
The locking mechanism must be adjusted correctly to allow smooth operation while keeping the payload securely mounted.
*Please refer to the video at the bottom of the page for a clearer demonstration and better understanding of the correct operating status.
Check
Correct Status ??
When rotating or engaging the QR lock, you should hear a clear and firm “click” sound.
This indicates the mechanism is engaging properly.
Common Errors
Under-tightened ??
The locking mechanism does not engage correctly
No click sound is heard
Payload may feel loose or unstable
Incomplete Lock ??
A click sound is heard, but the lock is not fully secured
Sound feels weak or loose
Payload may not be safely locked in place
Over-tightened ??
The quick release mechanism becomes jammed
Lock cannot rotate smoothly
Difficult or impossible to engage/disengage
How to Properly Adjust the Locking Tension
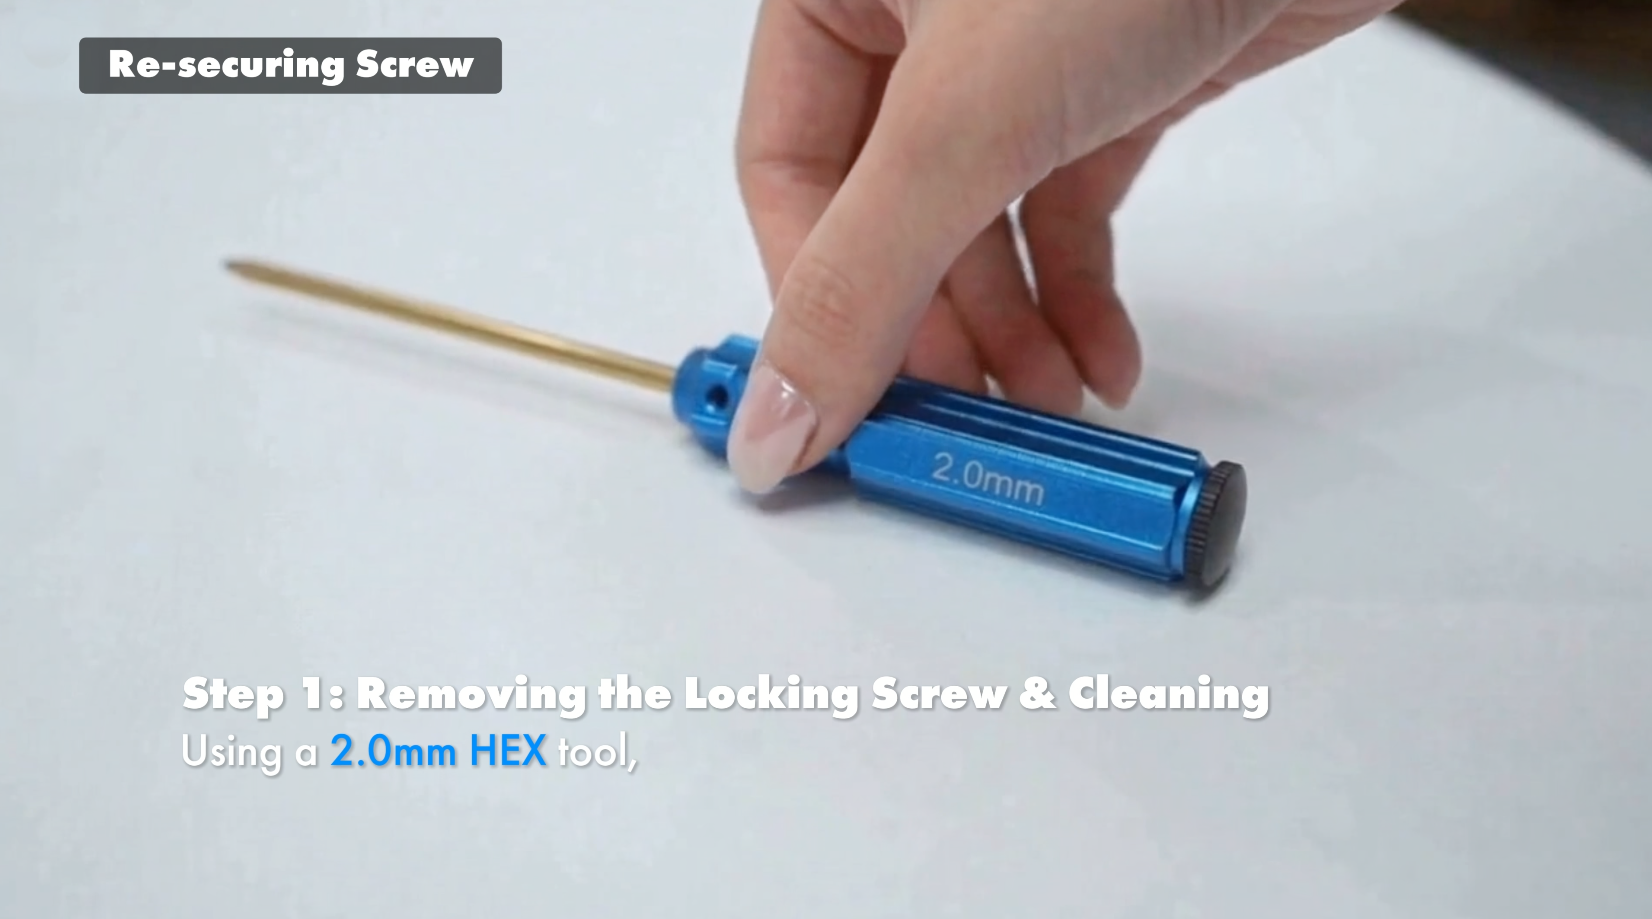
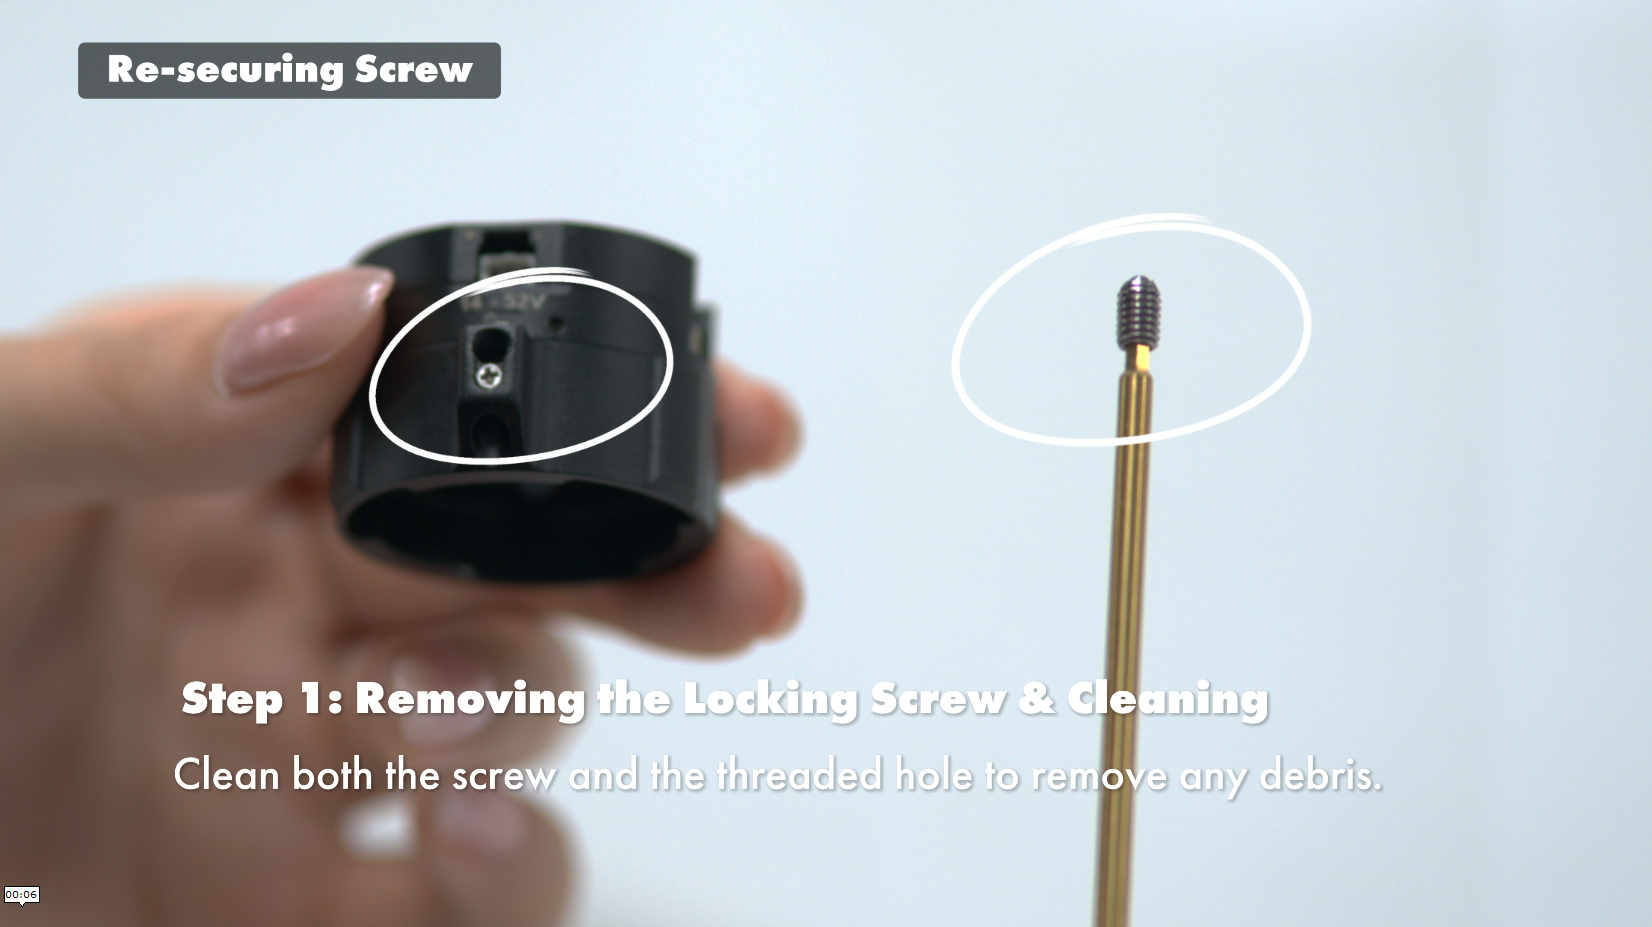
Step 1: Remove the Locking Screw and Clean the Area
Use a 2.0 mm HEX tool to fully remove the locking screw
Clean both the screw and threaded hole
Remove dust, dirt, or debris before reassembly
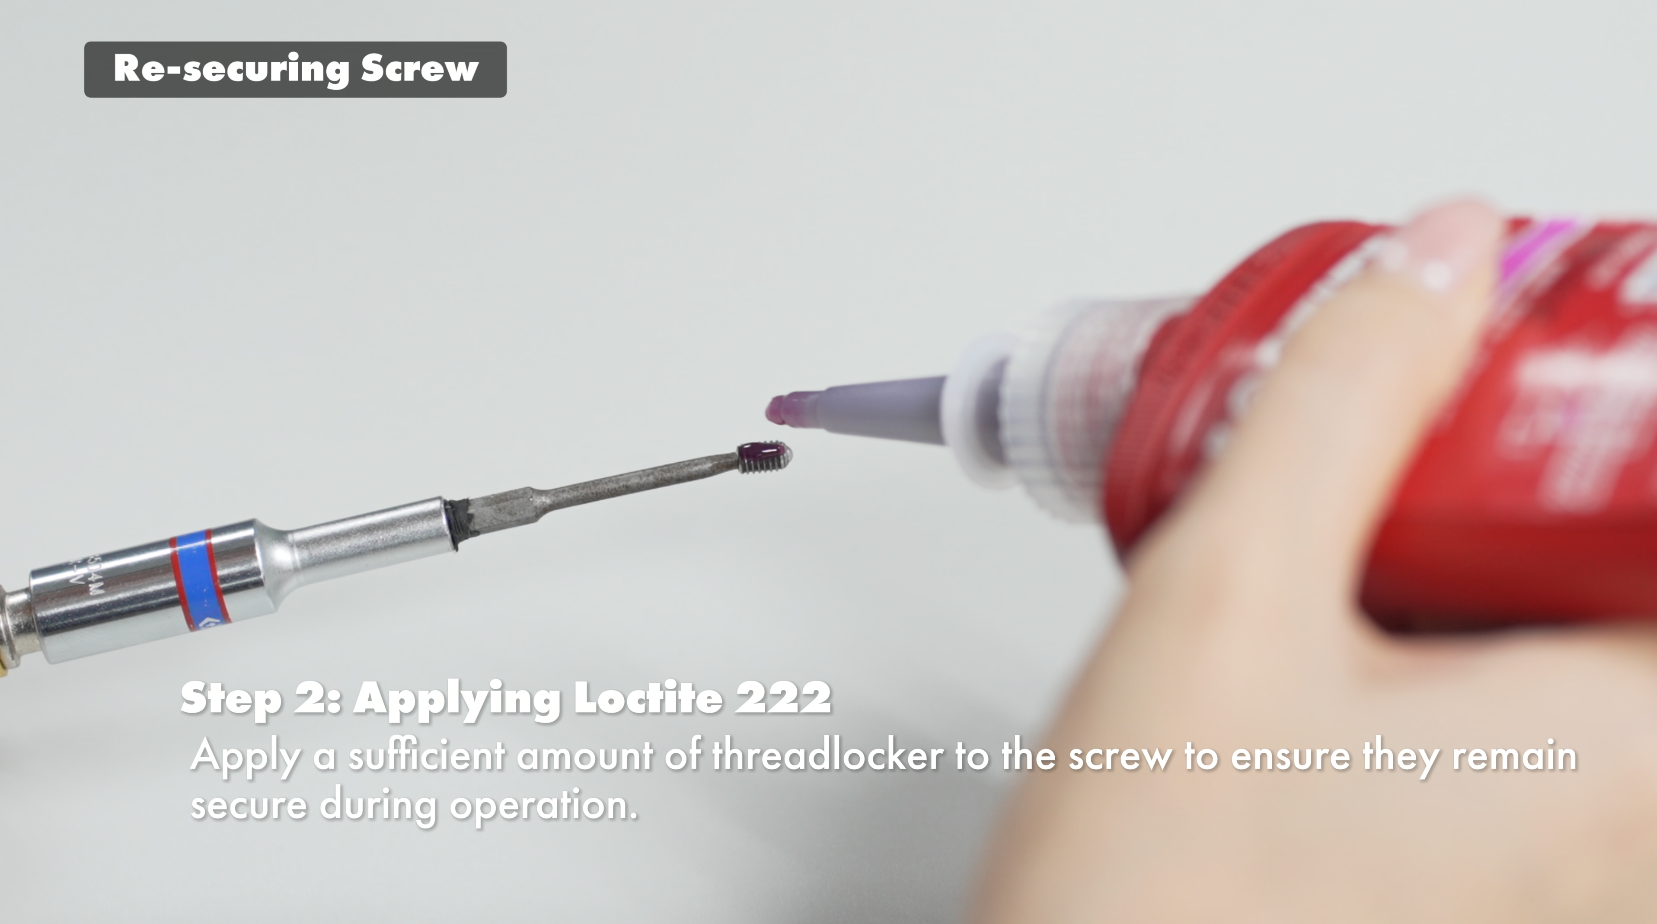
Step 2: Apply Loctite 222
Apply a sufficient amount of Loctite 222 threadlocker to the screw
Helps maintain secure fastening during operation
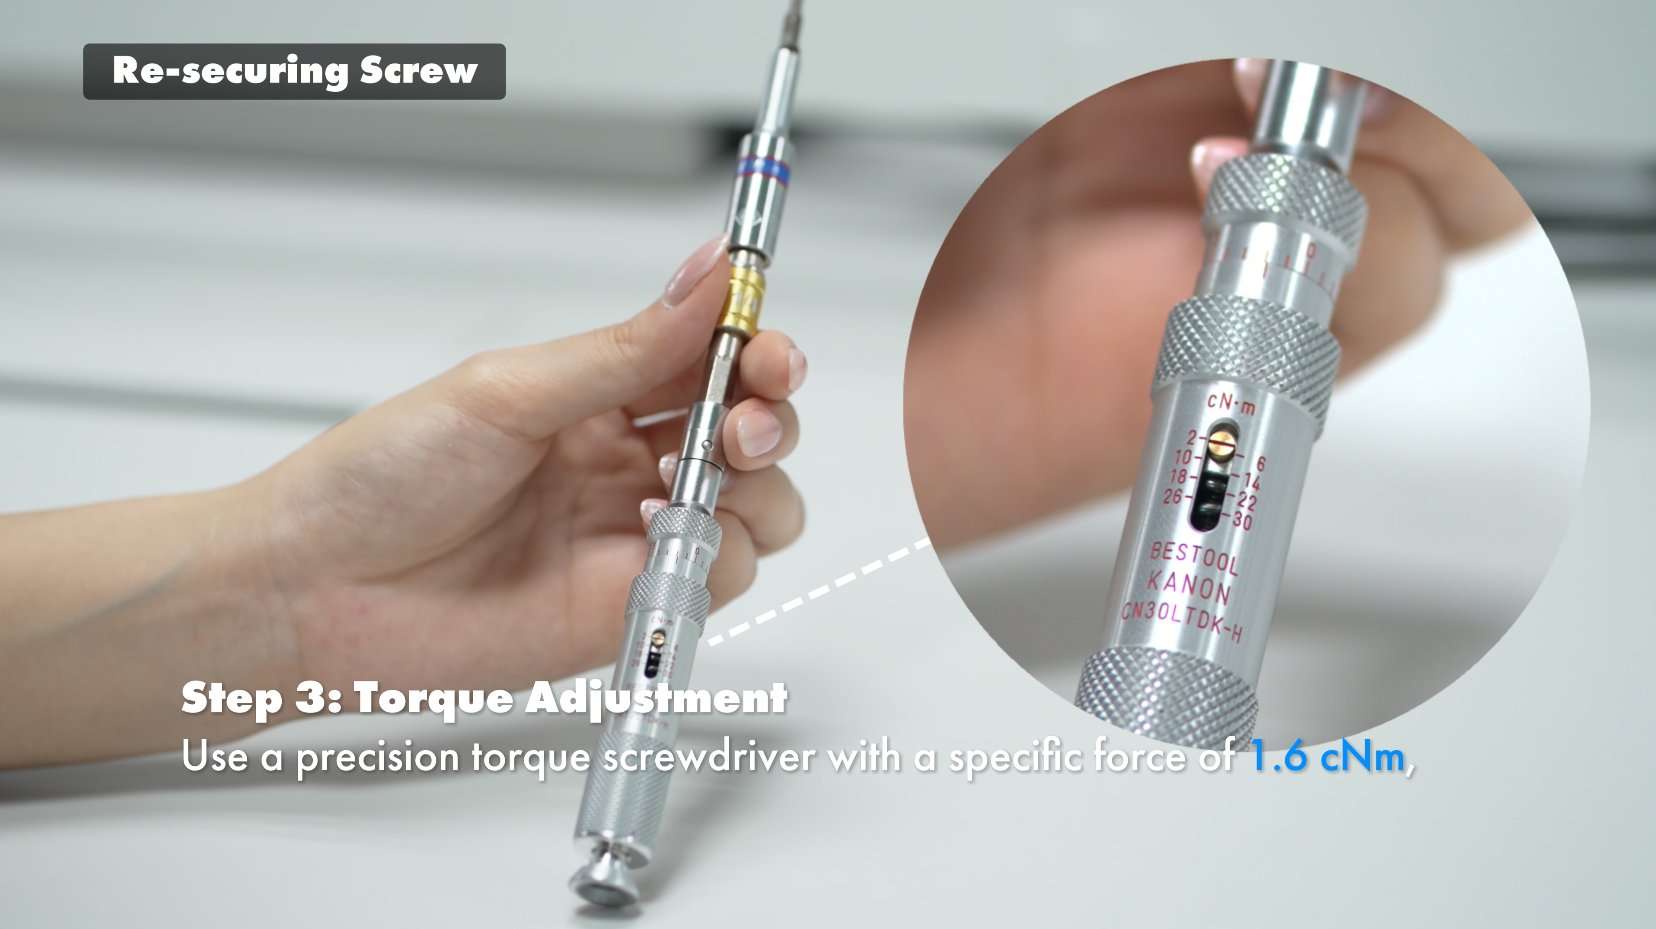
Step 3: Torque Adjustment
Use a precision torque screwdriver
Tighten to 1.6 cNm for optimal locking performance
Pro Tip
After adjustment, test the lock again and confirm a clear “click” sound is present.
Watch the Full Instructional Video
For a complete step-by-step demonstration, please refer to the installation and maintenance video here
If you need additional technical support, feel free to contact our support team.
Was this article helpful?
That’s Great!
Thank you for your feedback
Sorry! We couldn't be helpful
Thank you for your feedback
Feedback sent
We appreciate your effort and will try to fix the article